Wednesday, March 26, 2014

Controls and Seat Finished and installed!

Not much time to blog, but I did finish up a few more loose ends. A word to the wise... Never underestimate the difficulty of working in the cockpit of a mid wing airplane! I am looking forward to sanding after these two projects.

The new controls are lighter and will make the airplane easier to fly since I can now rest my arm on  my lap. Between the two mods, I went from about zero headroom to about 3 inches.


Monday, March 24, 2014

Other Uses for Welding Rods

Well, they are useful for welding too ; ) 

Not much time to blog these days with time running out to get the plane in the air and in the trailer for the Mojave Fly-in, but the list is getting shorter...

New Control System

The reason for revising the control column was to lower the seat so that I could wear a helmet. Along the way I discovered a few things. 

I had always blamed my plane's pitch sensitivity on the airfoil shaped tail and the gap seals. 

The control column was partially completed when I got the project but fit so I did not question it. Since there were a bunch things that were different than the plans so I started measuring things trying to figure out why they were built differently. I did not want to build something that did not fit. Most of what was different looked like solutions to mistakes that would have caused clearance issues.

The plans call for the control stick to be 9.375" from the pivot point to the top. Mine measured just over 12". I can't blame that on the previous builder since I built the stick. What I did wrong was put a teak wood grip on it that increased its length by 3 inches. Duh. The mechanical advantage was increased from about 3 to about 3.82. No wonder it had almost no resistance to stick movements during landing.

The reworked stick will be adjustable from 7-10 inches. It allows both tuning the stick force and removal of the upper part of the stick for maintenance.

The new system is almost finished. I revised it to fix some issues with the original design, mainly the rear idler. The way it was designed caused the elevator push/pull tube to seesaw within the control column. By redesigning it, the tube now runs flat, resolving a number of clearance issues.


The redesign also allowed me to move the control stick 3" aft, allowing me to rest my arm on my leg while flying. 


Still need to weld on the aileron control horn and finish a few details. I'll be happy to be sanding again...


Friday, March 21, 2014

Cowl Nearing Completion!

Lots of late evenings and help from Mark and Scott are helping things along.

Mark and Scott have taken over the installation of the wheel pants and are almost done. In the mean time, I finished the new seat bottom, started on the new control system, made a new dipstick tube and made lots of progress on the cowl.

Another 16 hours of shaping and sanding has gotten the cowl pretty close to completion. Part of the issue with it was that I had not completely figured out how to blend the shapes. Lots of filling and sanding of the same areas until I finally figured it out. What a geometric brain twister!


Friday, March 14, 2014

On to the Wheel Pants

I bought a set of Sam James wheel pants since the ones I had were not very aerodynamically clean. They had a big brake bulge and the shapes were not very good. I had previously tried to fit one of them but I discovered that since my brake calipers were in front of the wheel they interfered. I pulled one wheel and brake assembly off to move the caliper only to discover that whoever drilled the axles and gear did not do a very good job. It was impossible to make the switch without elongating the holes in the gear leg, something that I was not willing to do, so I put them back together as they were. I was able to shorten a few bolts and used low height hardware and got them to marginally clear the front of the pant.

Back to the pants... I started off by calling to confirm that they were symmetrical, which I was told they were. After I got looking at them, they are close, but not really. They came with a fastener flange, which after about two hours of trying to figure out what the reference for "aligned" was, I was disappointed. Between random the cut on the front part of the pant and the asymmetry, I considered splitting them and starting over, but I don't have them time to obsess about it. I did my best with what was there and the rest will have to be cleaned up with filler. Its not that they were horrible, but I would have rather just gotten them with straight cuts and no flange.

After getting them aligned as well as I could, I hoisted the plane up in the air and got one trimmed to fit. After it was said and done, it took about 3 hours to mate the two halves together and about 30 min to get them on the plane. Soooo much easier when you can get the wheels up to shoulder height!


The plane still looks horrible, but it was the first time that I could really see how all of the new shapes work together.


Oh ya, I tried to work out the oil cooler plumbing again with the fittings I have and actually came up with a solution, but did not have enough hose to make it work, which is why I moved to the pants. Tomorrow night I should be able to get the other pant on and finish up their attachment brackets. 

Anyone local have about 3' of -8 braided hose?

Anyone want to drop by and get their hands dirty? ; )

Wednesday, March 12, 2014

Pillow Blocks and Oil Cooler Plumbing

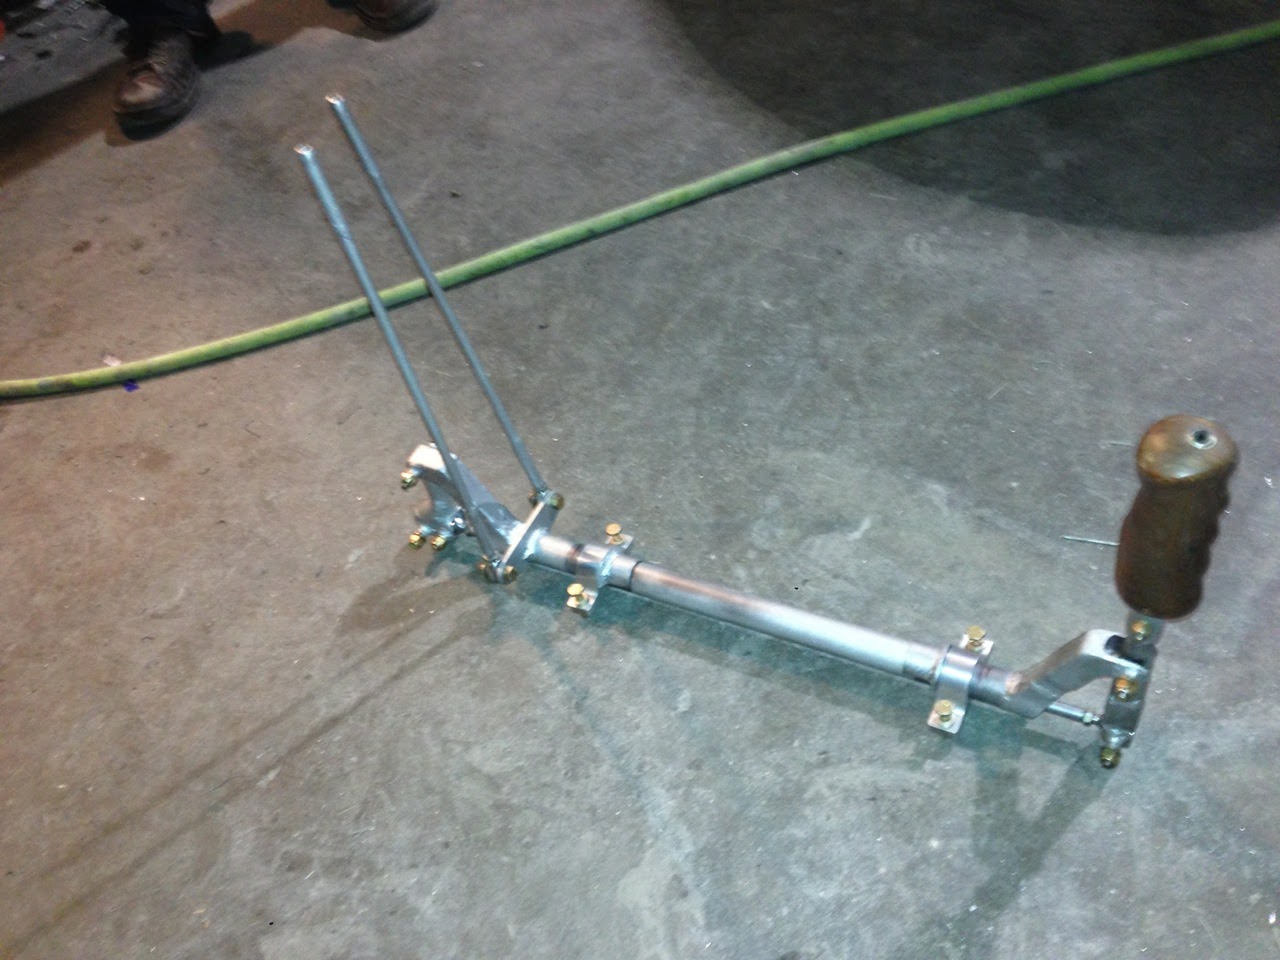
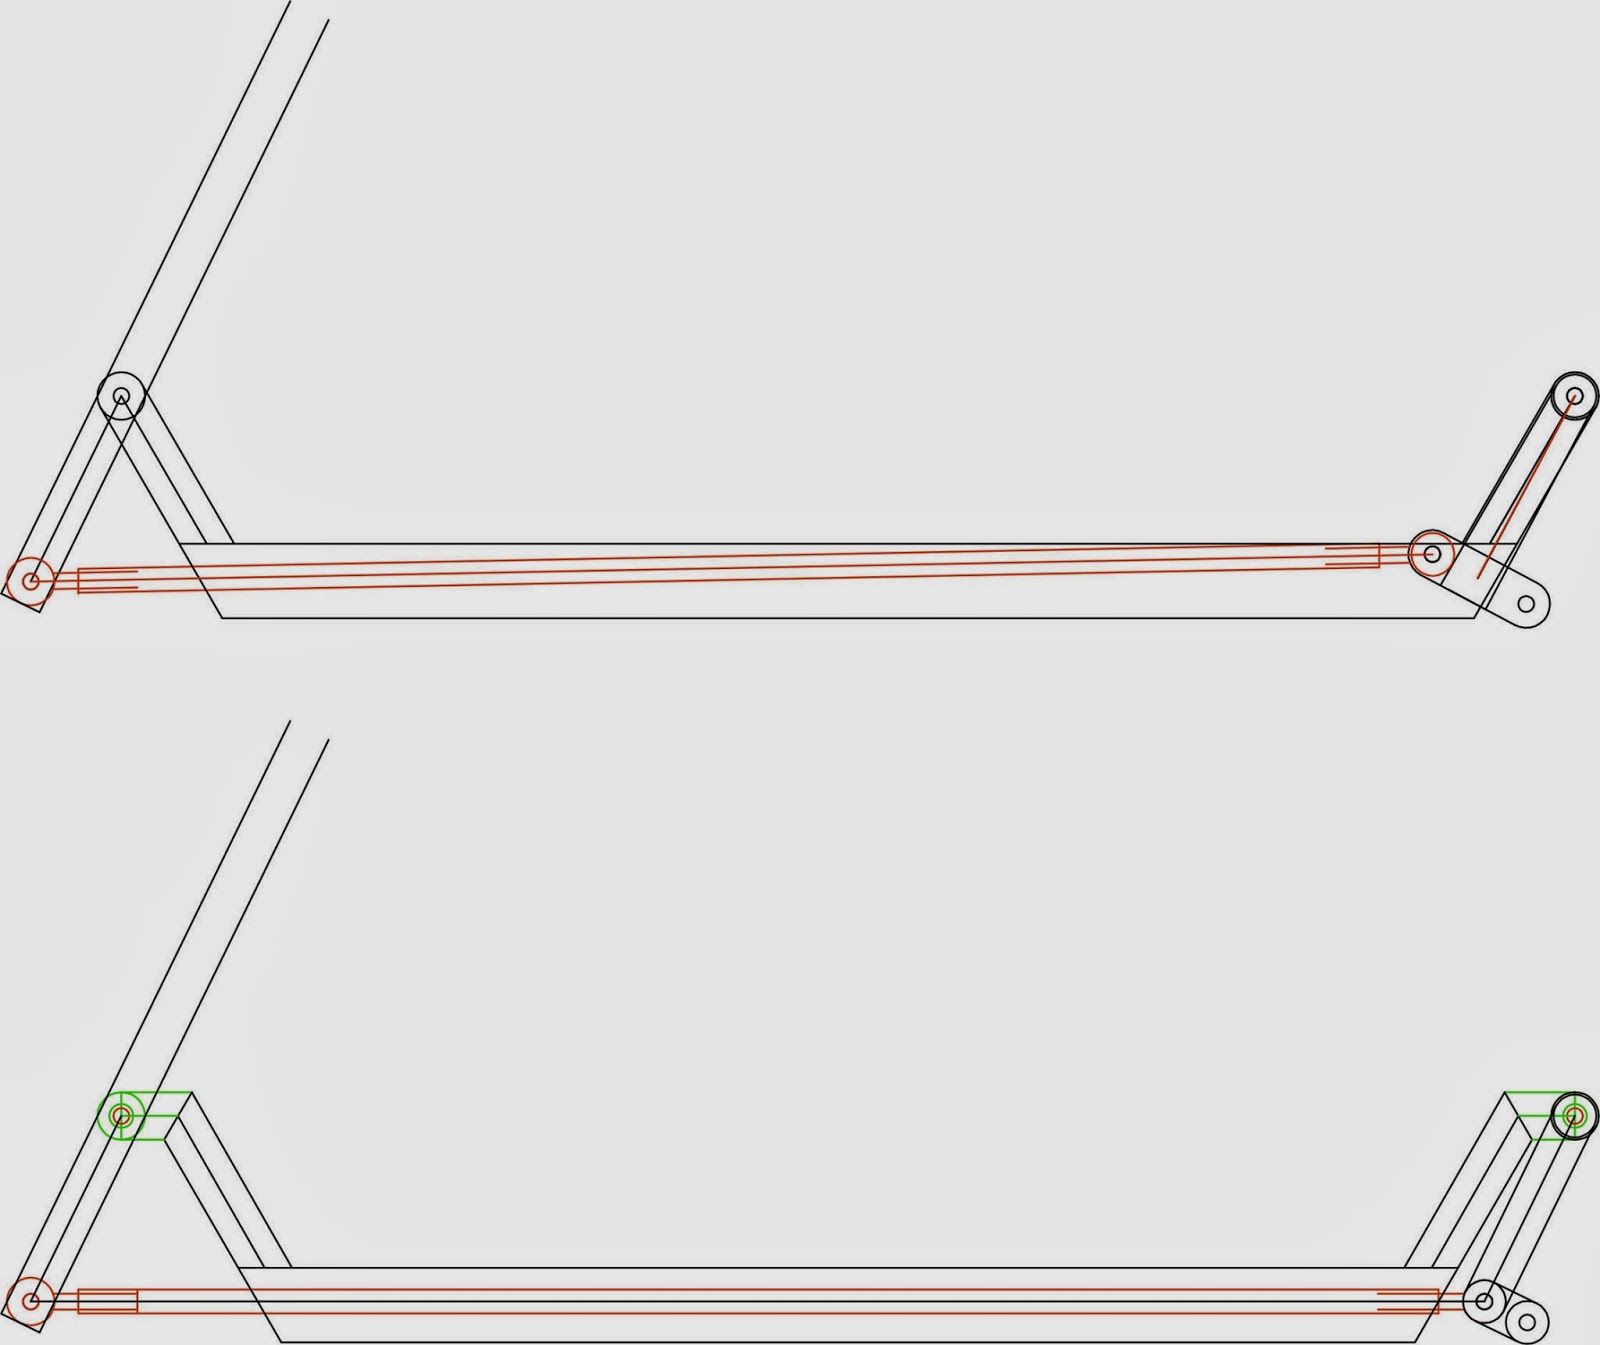
A number of people have inquired about how the lubrication groove in the pillow block was cut. I set the drill press for 3000rpms and chocked up a rounded Dremel bit, then set the drill press table to the proper hight and worked the pillow block around it by hand. The shaft of the bit and the size of the cutting tool determines the groove's depth.


WARNING: LOTS OF WHINING IN THIS NEXT PART!

The thing I despise the most about building airplanes has always been cooling baffles, but plumbing is now at the top of the list. First it was trying to fit the fuel system in a tiny space. It looks simple on paper:


Not shown are the 3 fuel tanks, the main of 9.7 gallons, a front aux tank of 3.3 gallons and a rear aux of 5.5 gallons. The front aux tank is cross fed from the main as it has no filler neck. However, in flight you can select each tank independently.

The system uses two fuel pumps in parallel, otherwise if run in series, the pressure is doubled. To keep positive pressure to the carb while only one pump is in use, there is a check valve after each. The carb uses a return line to regulate its own pressure.

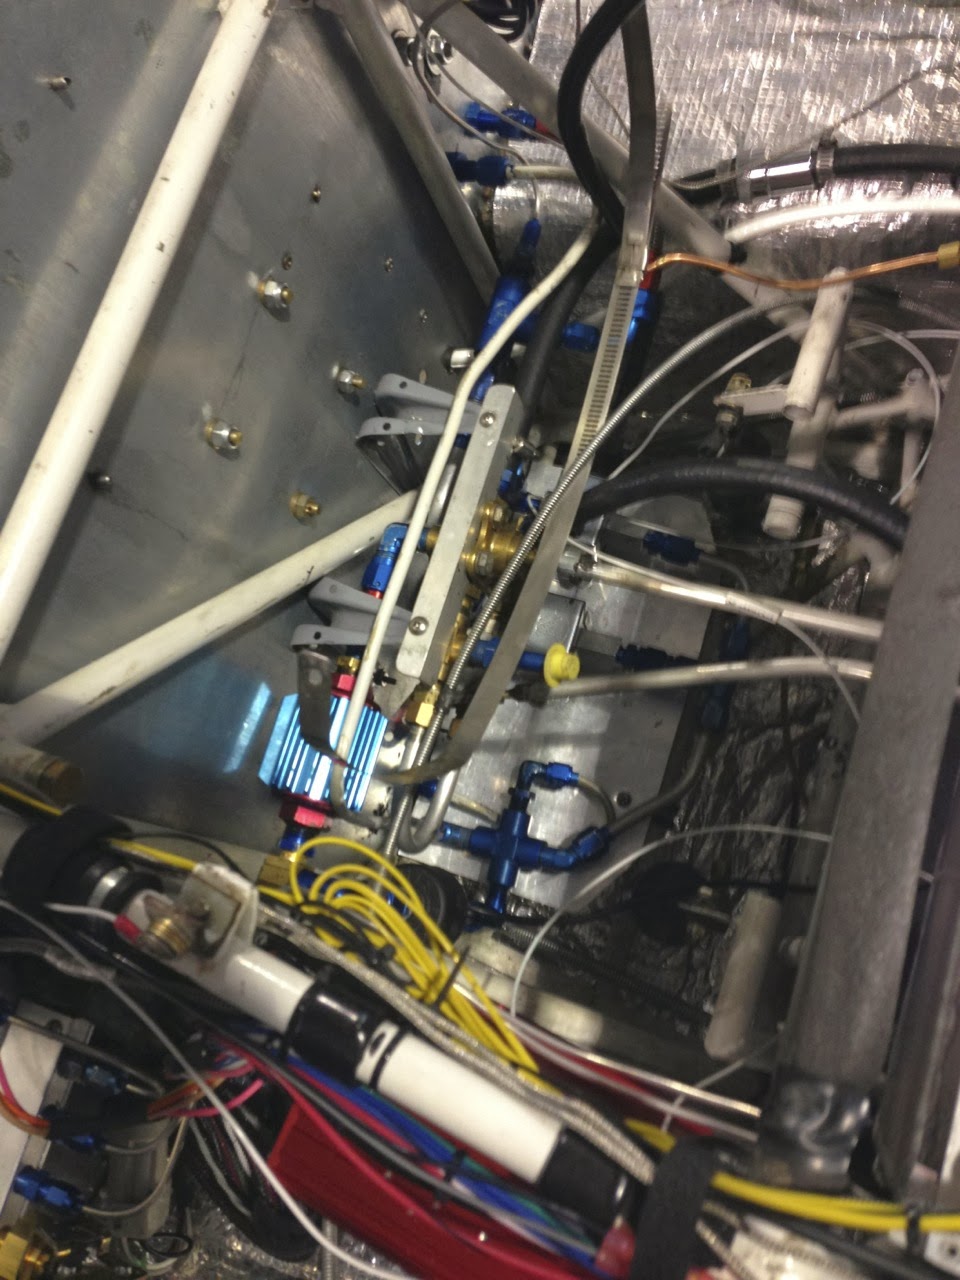
The picture below is not a good one, but lets start in the middle with the fuel selector valve. From there the line goes forward and makes an immediate turn to the left and enters the fuel filter. From there, it has to turn aft and then down into the fuel flow sender. From there it turns to the right and feeds the 4 way fitting. The aft line heads down and then splits to feed the pumps.

All of that is kind of visible if you look closely. What can't be seen is that as soon as fuel leaves the pumps (now heading forward again), they have to turn straight up and feed through the check valves. After the check valves, the lines rejoin and head to the right side of the plane and go through another "T" that allows a spot to pick up fuel pressure.

Then the carb feed line goes through the firewall, with the return line coming back right next to it, which then snakes around into that 4 way fitting mentioned earlier. The last line from the 4 way is the low point system drain... about 80 hours of work all said and done. Grrrr.

And yes, those are shelving brackets from the hardware store supporting the fuel valve ; )


Same kind of stupidity is going on with the plumbing for the oil filter and cooler. There is just no space left.

END RANT

The list is getting shorter however. Here is the remaining list of gak that needs to be finished:
  • Repair a few holes in the cowl from excessive sanding
  • Finish the stooped oil cooler plumbing
  • Finish the oil cooler inlet interface
  • Fix the cowl flange and install fasteners
  • Install the wheel pants
  • Finish the right side cooling baffle and inlet flange
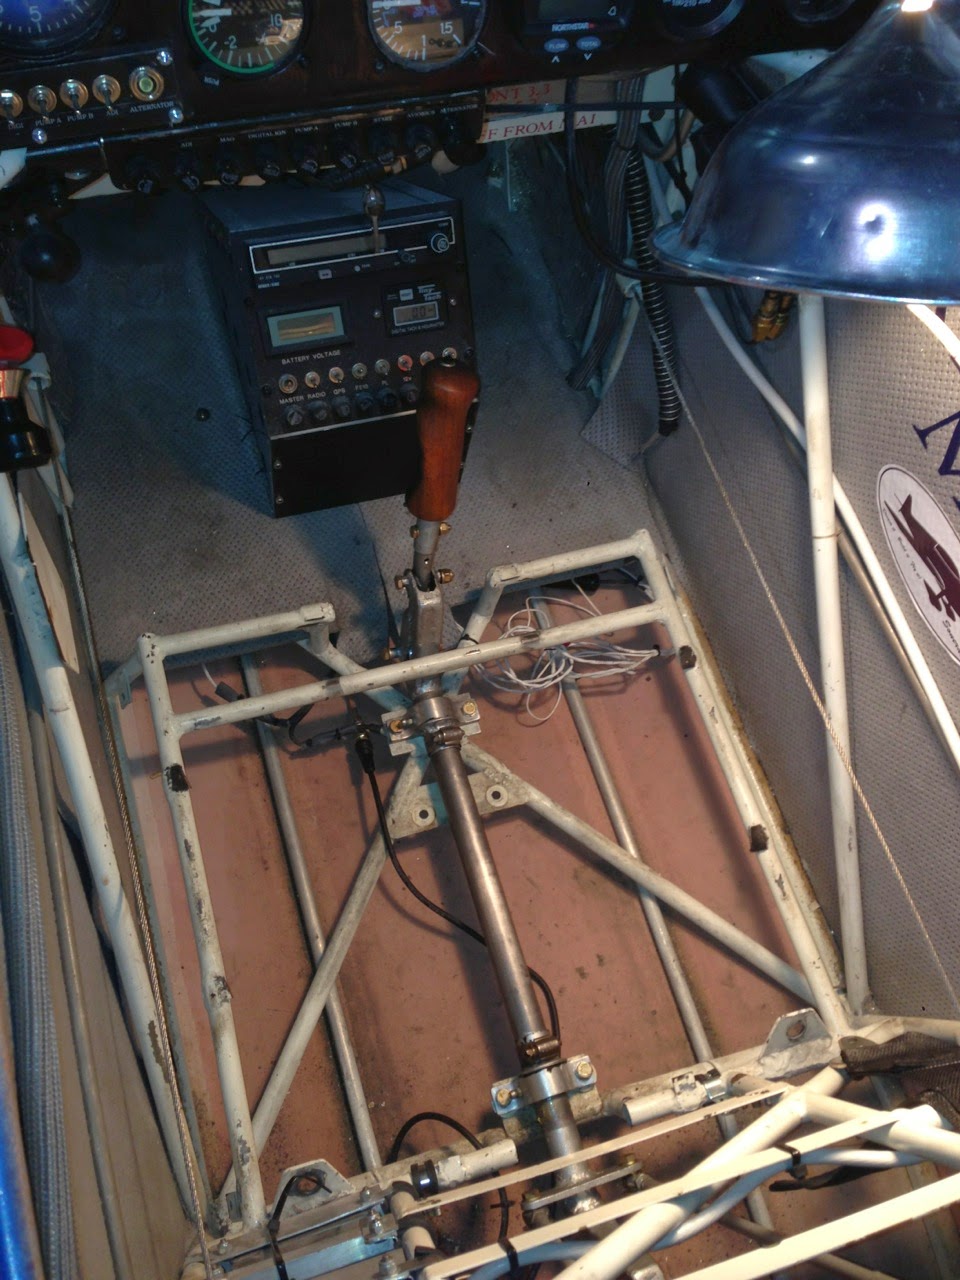
  • Complete the new control column
  • Make a new seat pan
  • Make lots of heat shields
  • Contour the prop blades at the roots
  • Finish up the filler plates on for the spinner
  • Sand and paint the cowl and pants
  • Make new pushrods for the engine and set up the valve geometry
  • Modify my new helmet to fit under the canopy and install electronics
  • Modify my O2 mask to work with my fresh air inlet
I am sure there is a bunch of other stuff to do. I had hoped to fly it to the Mojave Fly-In (http://www.mojaveflyin.com) in a month, but I'm not sure that I will be entirely comfortable flying it to the other side of the country yet. At this point, it looks like its going to have to ride in the trailer. I am hoping to at least have the 5 hours flown of so that I can fly it while there!